 SmartTask
Contents
How to Create a Project Timeline
By Yash GurnaniJun 7, 2022
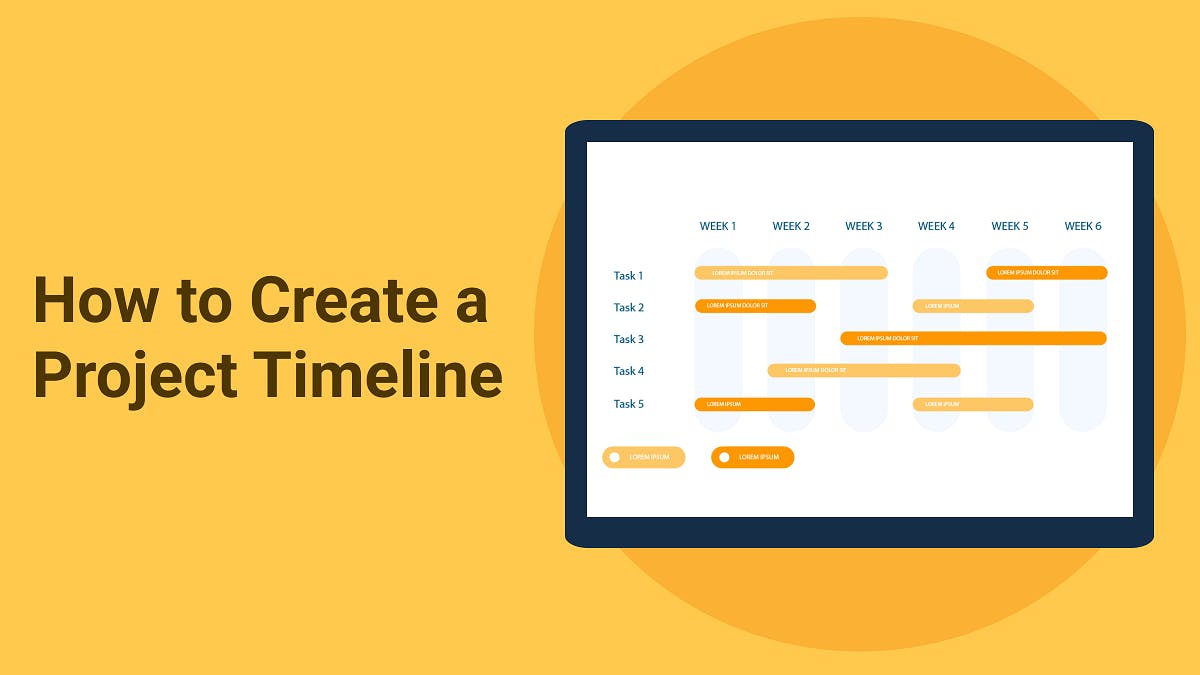
Managing a complex project feels like eating noodles with a spoon. But aligning tasks with a reasonable deadline can save you from the mess.
With a Project Timeline, you can maximize team productivity and efficiency. In this article, we cover a complete guide on how to create a Project Timeline and help prevent losing control over projects.
But first, let's dig into some basics of project timeline management.
What is a Project Timeline?
A project timeline is a visual representation of a project's deliverables. It helps navigate from the very start to the end of the project just like Google maps. It provides a simple yet comprehensive overview of a project. You get a clear picture of the project roadmap with milestones, dependencies, individual tasks, and deadlines.
Having a timeline ensures that the tasks are in place and are well aligned to be completed. For e.g. Product launches can go very well once the timeline is finalized and every team member is aware of the next steps and the milestones.
Why do you need a Project Timeline, anyway?
No matter how brilliant of a project manager you are, without a project timeline in place, your project is likely to fall apart. Here is a brief list of the benefits it brings:
- Project Timeline keeps track of what happens and when. It helps in knowing the hierarchy of tasks.
- Helps enhance communication as it keeps both the team members and stakeholders in the loop. This way everyone involved in the project can track its progress.
- Project Timeline helps in ensuring proper distribution of workload. Helps avoid burnout.
- It gives you insights into whether the project is going as per plan. Project baseline helps compare the current plan with the original one.
How to Create a Project Timeline?
Creating a realistic and productive Project Timeline is the most important and primary step as you start a project. Sure it requires a good amount of time, effort, and brainstorming, but it can get tricky if the project is complex. With a powerful project management tool by your side that can manage multiple projects, the process can get smooth and easy.
Let's understand how to create a project timeline step-by-step:
- Finalize Project Scope
- Create a To-Do list
- Define Project Milestones
- Map Task Dependencies
- Create a Work Breakdown Structure
- Balance the Team’s Workload
- Freeze Project Baseline
- View Each Task on the Project Timeline
1. Finalize Project Scope
Making a Project Scope statement will cement your objectives, deliverables, deadlines, constraints, milestones, and other measures that affect your projects. It outlines everything that is required to avoid scope creep and meet project goals.
Project scope management should be done to fulfill stakeholders’ and clients’ expectations. It provides you with a clear idea about the project and establishes control factors to deal with changing requirements. You should think and precisely include every possible detail in the project scope to tackle any changes.
Having a project scope doesn’t prevent any changes but helps in tackling them.
By using SmartTask, you can add a scope statement in the project description and make it easier for other team members to access it. By doing this, you align stakeholders on a clear path. For example, the marketing team and engineering team would be in sync with each other knowing exactly what is expected.
2. Create a To-Do list
Before you start working on any project, it is necessary to create a to-do list. The checklist` would serve as a roadmap for your upcoming activities. It will include:
- Project description
- Processes and Tasks
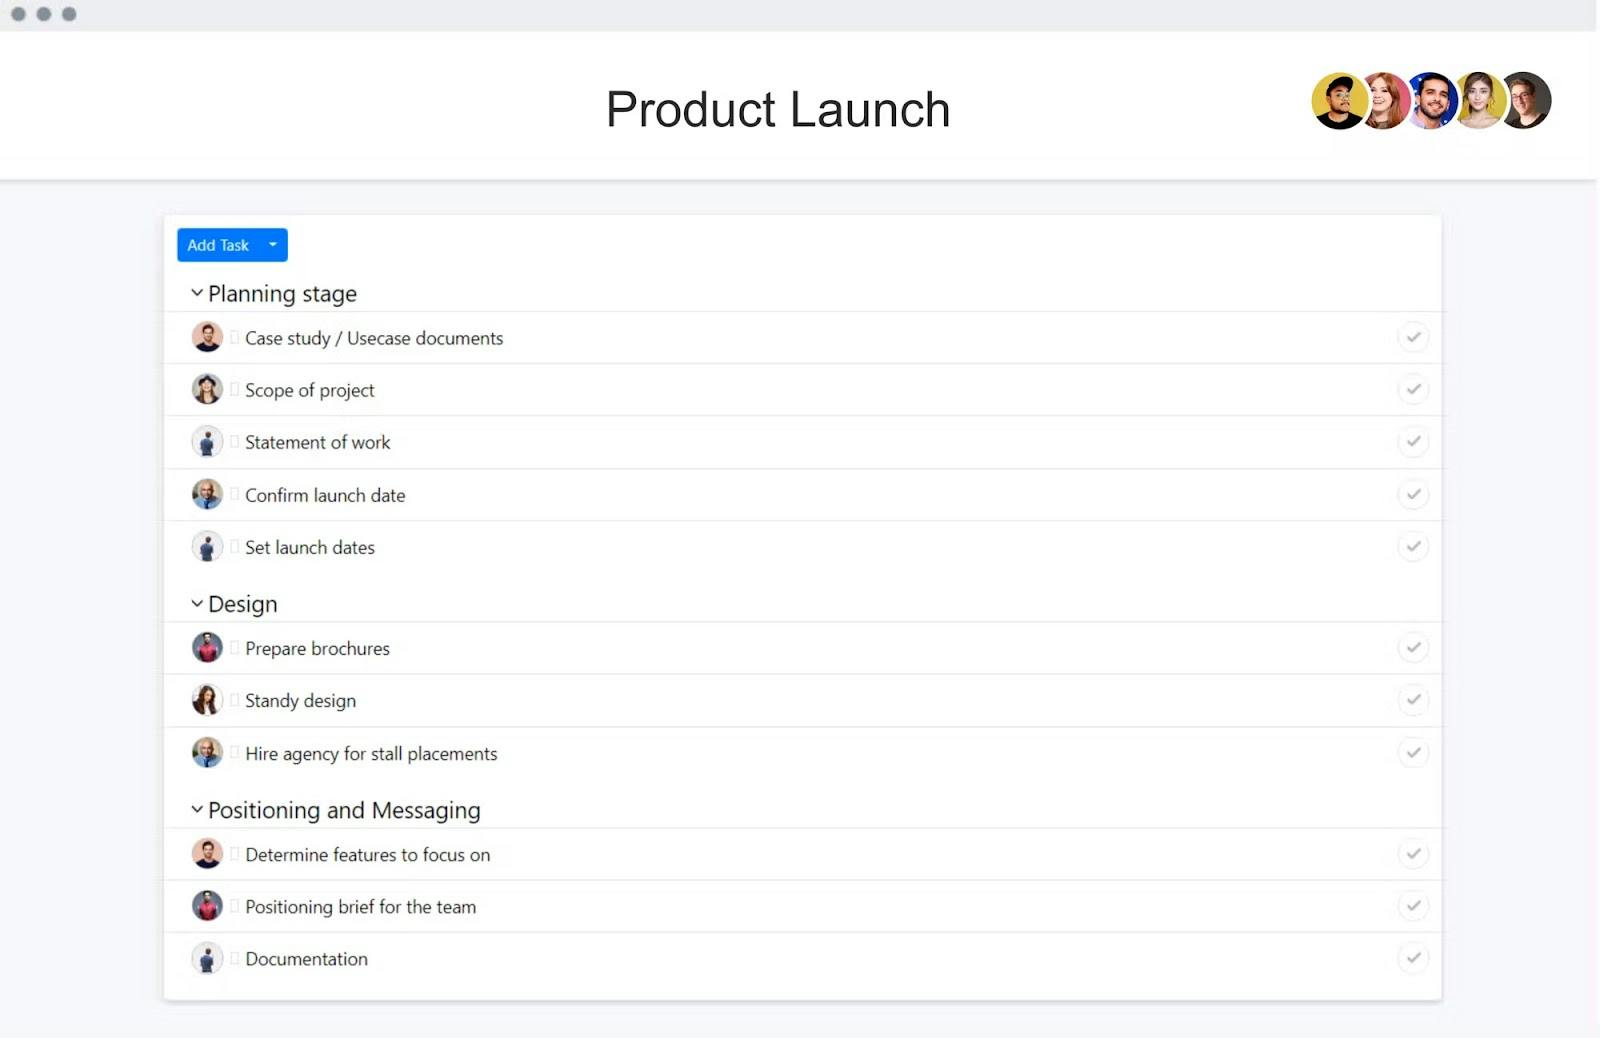
This would help you in executing the project by listing all the tasks that need to be done. This step will ensure the proper execution of the plan. In the above list 👆, we can see the tasks that need to be done for the product launch.
3. Create Project Milestones
Project Milestones mark the end of one phase and the beginning of another phase of the project. These are important dates on the calendar that helps you to monitor progress and get an idea about the project's completion. They also help in getting intermittent feedback from clients.
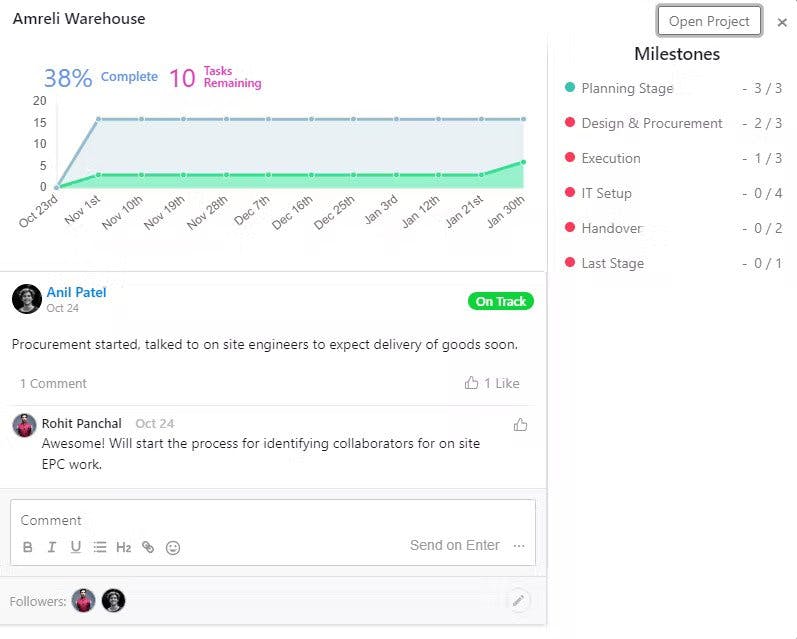
With SmartTask, you can set a due date, time estimates, and milestones.
4. Define Task Dependencies
Task dependencies help connect consequent tasks together. Once the current task is completed an automatic notification informs the next person to start their work. It further helps identify bottlenecks and allocate additional resources if needed.
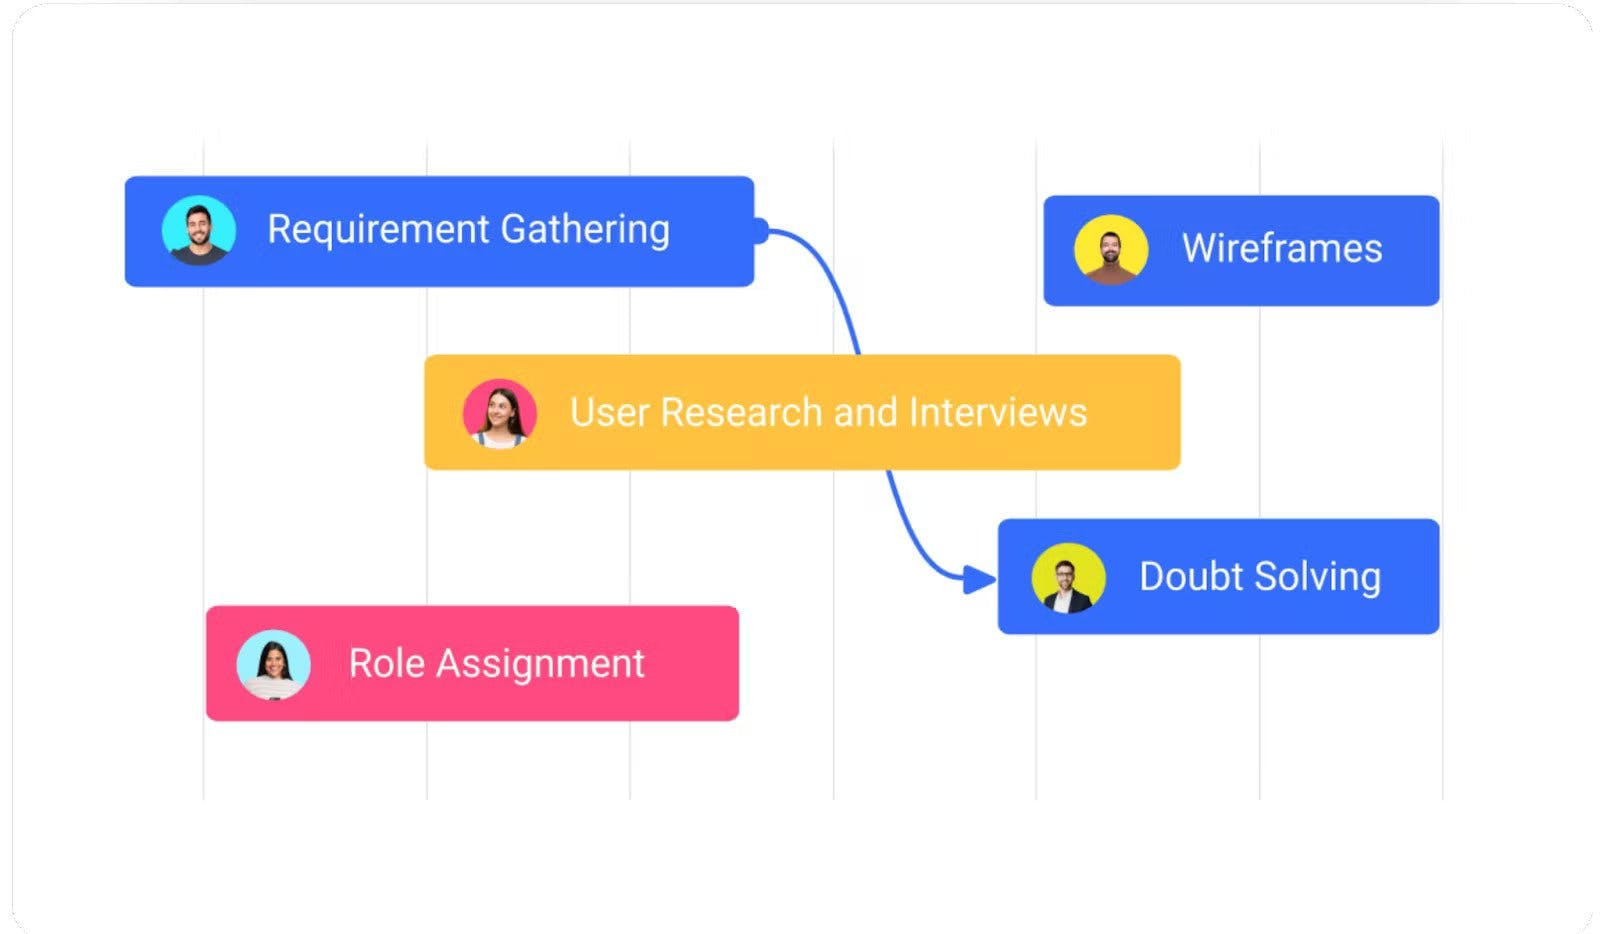
SmartTask lets you create dependent tasks in just three steps. They are:
- In the Timeline view, click on the bubble on the right-hand side of a task
- Connect it to the next task’s bubble
- Boom! You did it!
5. Create a Work Breakdown Structure
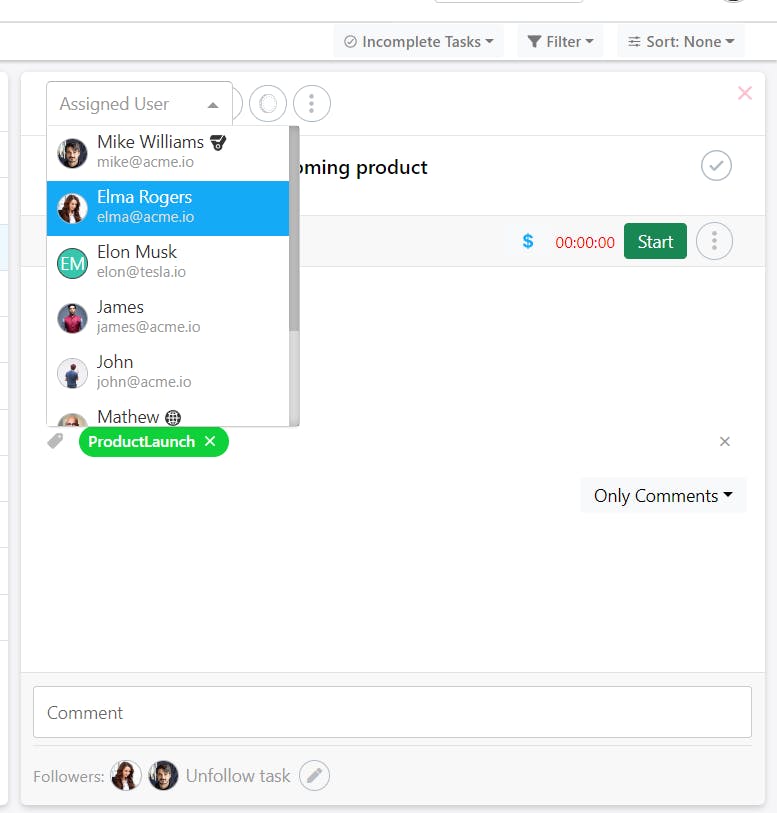
Once tasks, milestones, and dependencies are defined. The next step is to allocate tasks to team-mates (work breakdown structure). And align it to your Project Scope.
While all major tasks are defined till we reach this stage, it's important to further divide tasks into subtasks, making it easy for the team members to work on the deliverables.
Also, allocate each task to team members so there is clarity on responsibility and accountability.
6. Balancing Workload
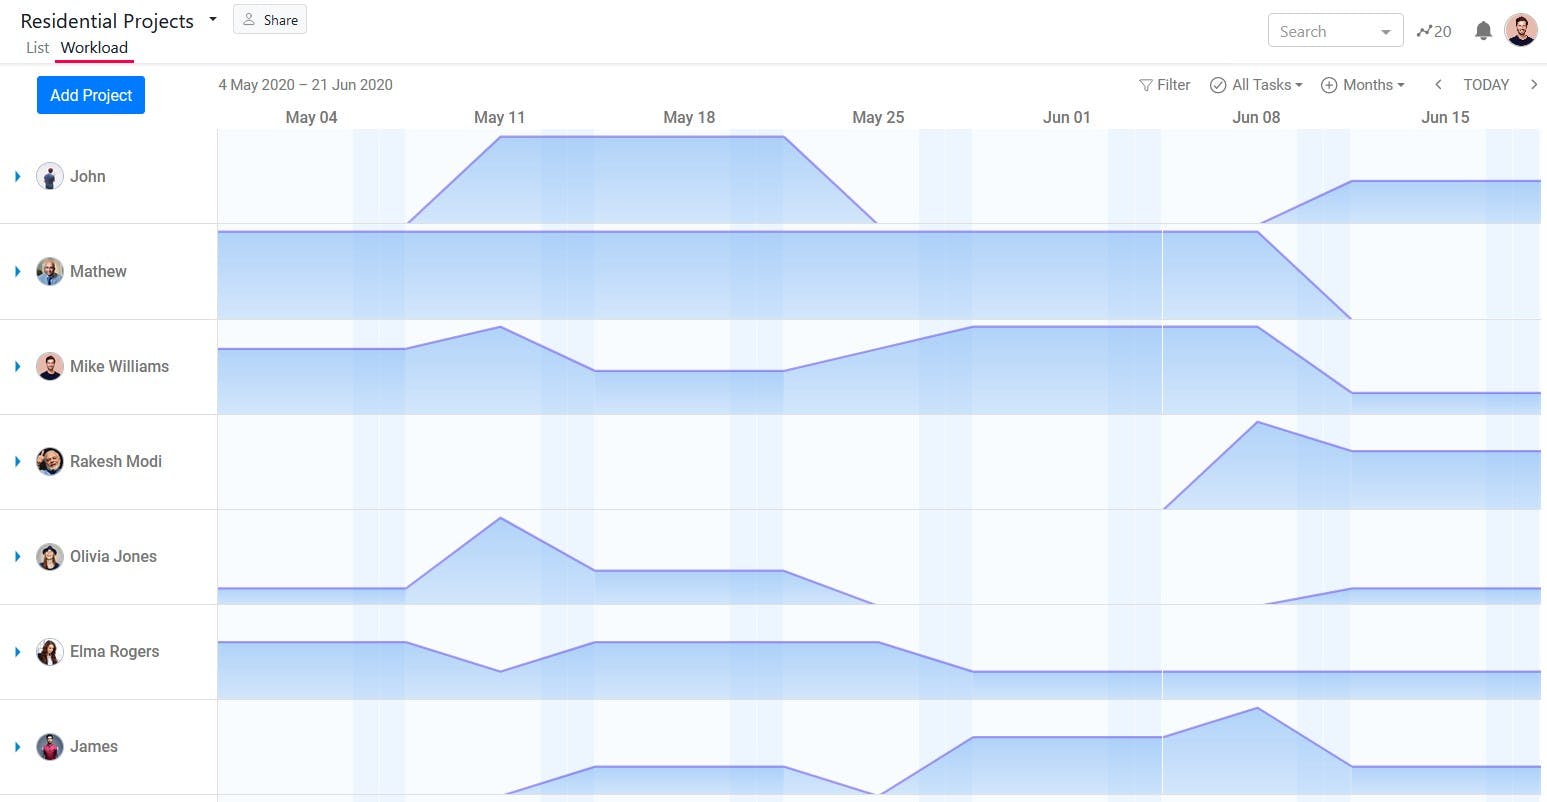
While we have assigned tasks to our team members it's important to make sure that each resource is not under-utilized or overloaded.
Overloaded resources would mean a demoralized team. Eventually leading to falling in productivity and an increase in the attrition rate. To avoid all this, it's important to visualize the workload.
With SmartTask you get a view similar to the one below identifying overloaded resources. You can re-schedule or re-assign tasks to unload overloaded teammates. In effect balancing the team’s workload, leading to better results.
7. Freeze Project Baseline
Once the Project scope and task timelines are defined the next step is to finalize the baseline.
A project baseline is a simple means utilized by project managers to compare the actual timeline with the planned one. It is finalized at the beginning of the project after consulting with the client and project manager.
A project baseline mainly consists of three baselines based on the factors, i.e. cost baseline, schedule baseline, and scope baseline. These baselines known as performance measurement baselines (PMB) enable you to understand the impact of modification in one component over other components.
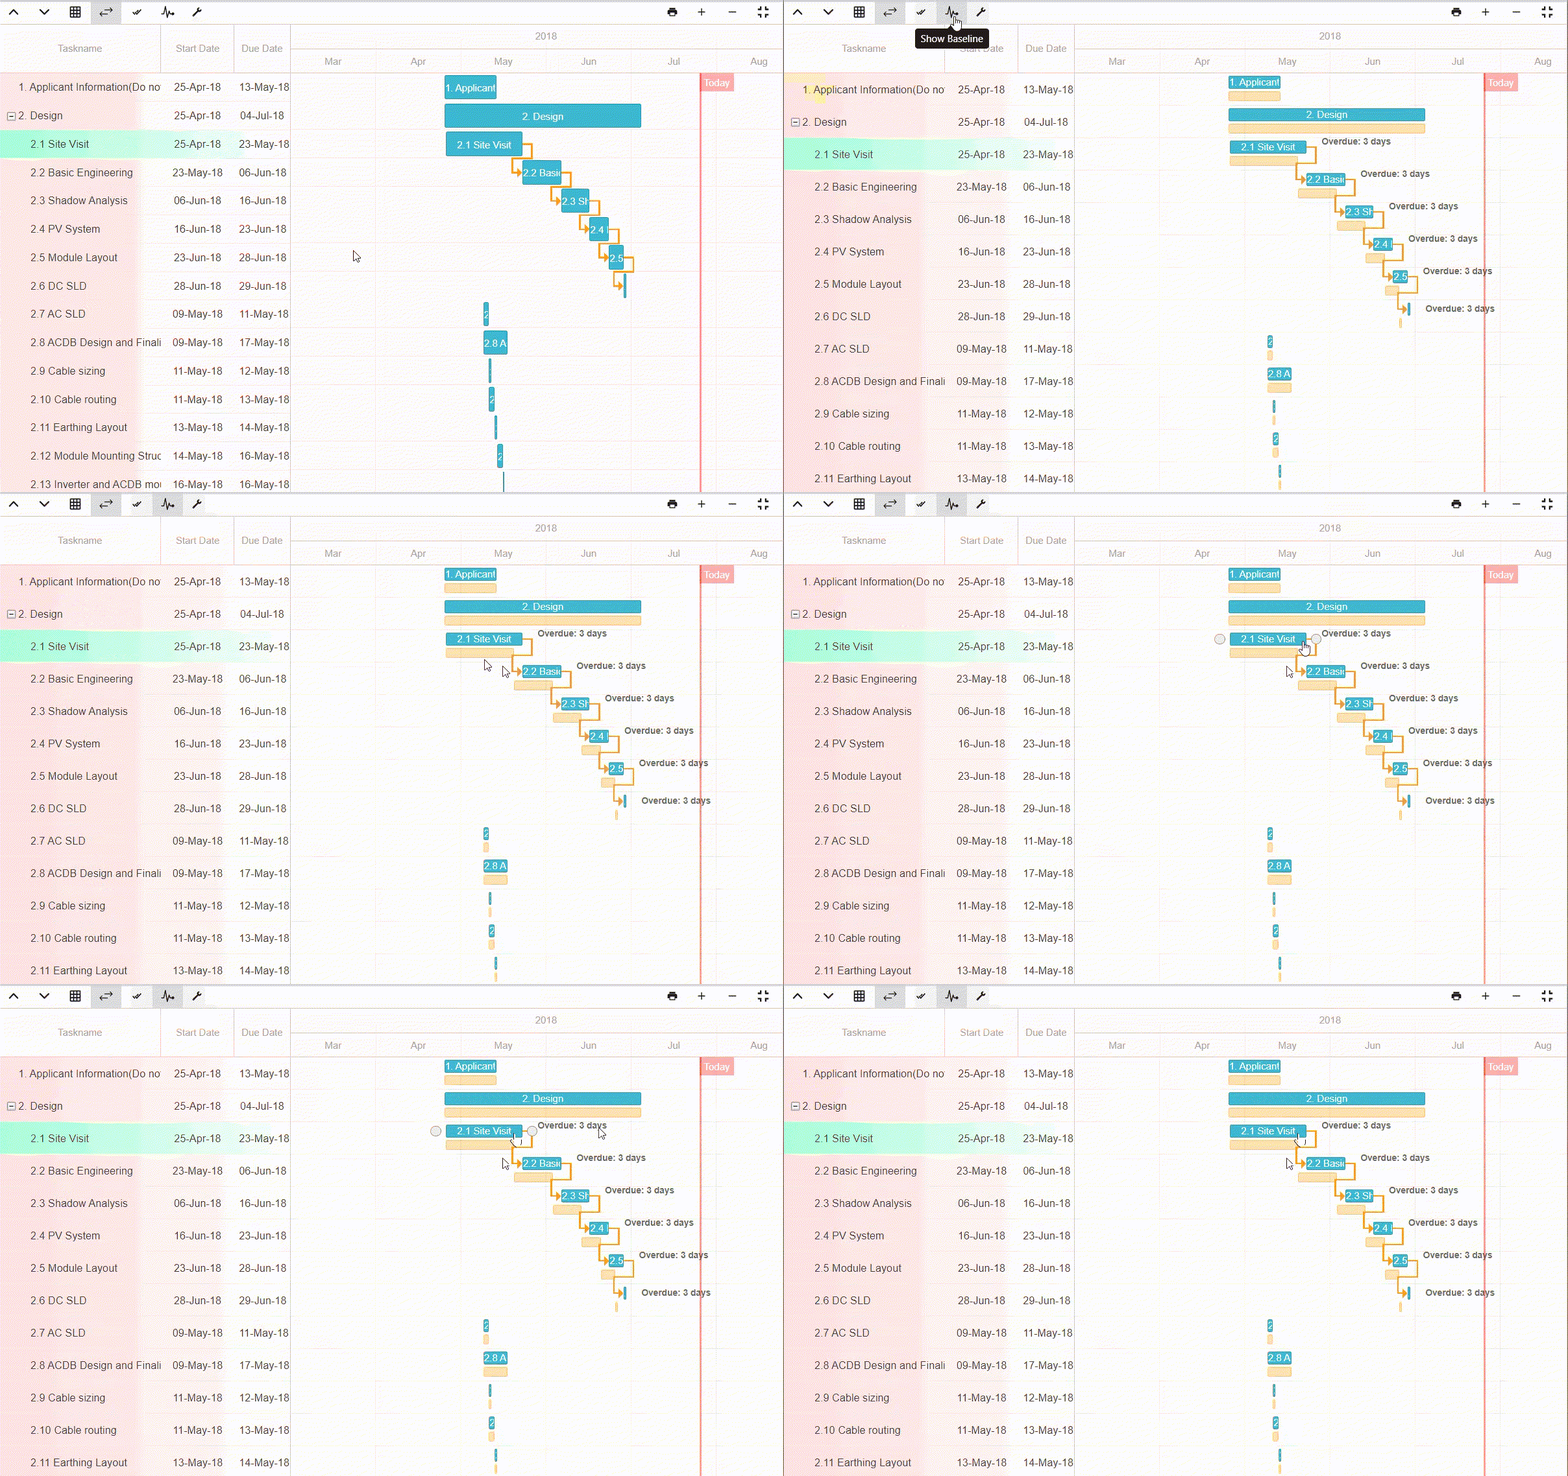
Above, we have illustrated a high-level baseline. Have a look 👆
Again, you can create the project baseline on SmartTask in just a few steps:
- Select the relevant project
- Go to the Timeline view
- Once the initial task timelines are finalized, click on “Save Baseline”.
- After that, go to the timeline view and click on “Show baseline”
- And that’s it! Now you can periodically monitor schedule deviance from the original plan.
8. View Each Task on the Project Timeline
SmartTask helps you create and monitor project timelines with its easy-to-use interface. All you have to do is write your tasks and set start and due dates. The timeline view would now automatically populate with the filled-in details.
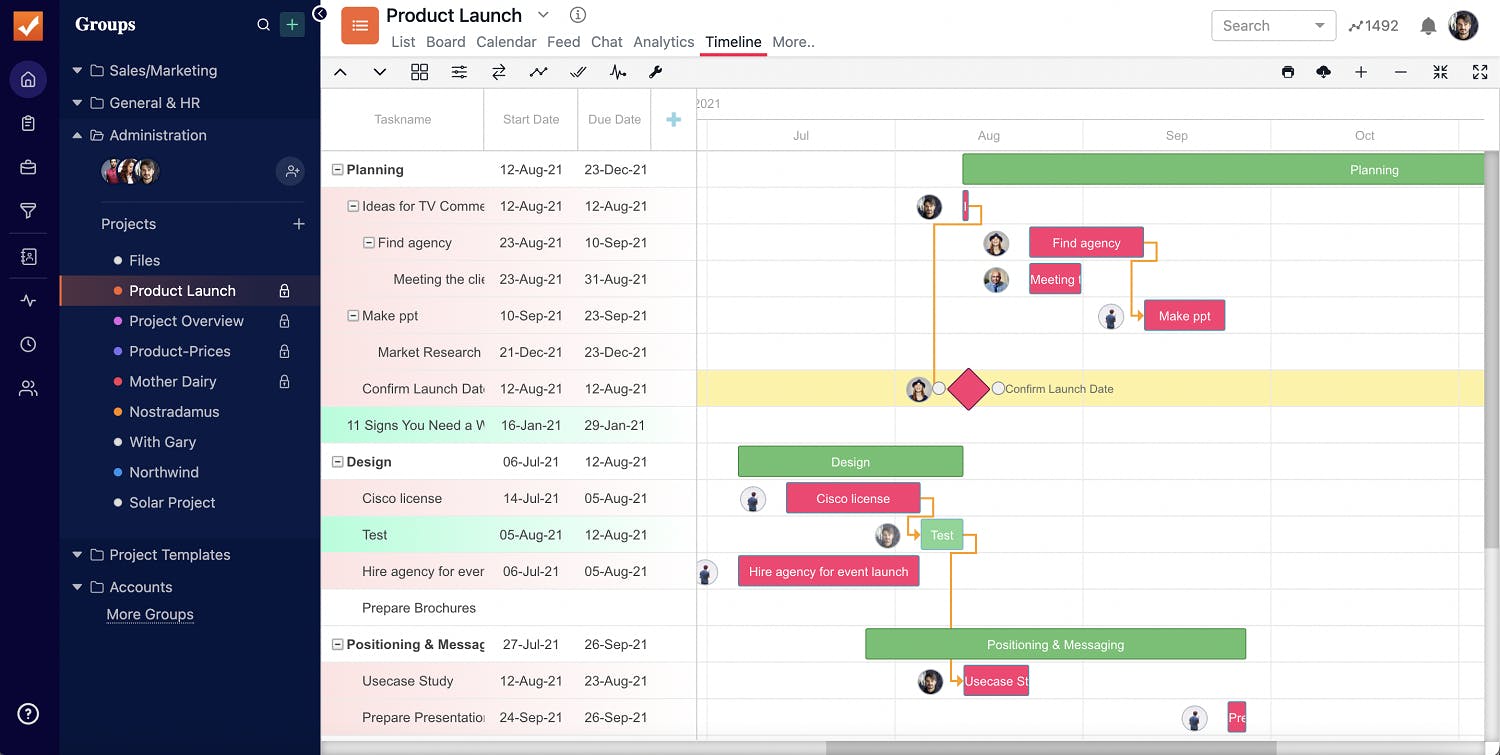
The best part? You could invite your teammates and even your clients for their feedback and share progress updates. Unlimited clients can be invited for free through the guest user feature.
SmartTask - Your Ideal Project Timeline Application
SmartTask is a spear that helps you lead your team like a pro. It is an all-in-one project management tool that lets you create a project timeline and set deadlines, milestones, and dependencies.
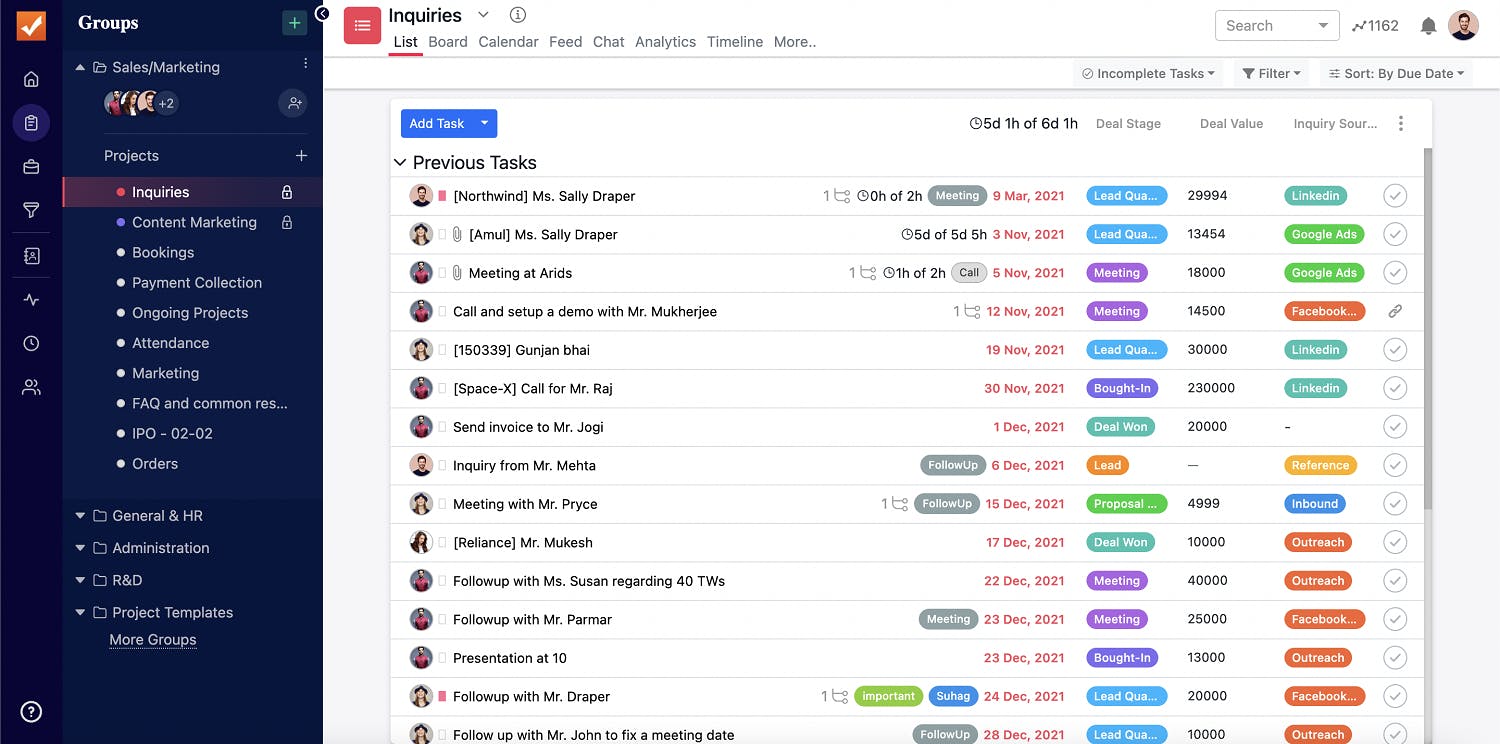
With multiple views like Custom Charts, Boards, and Calendars coupled with powerful features like Portfolio, Workload, Time Tracking, and pre-made templates, SmartTask helps you track your team’s work with ease. Did I mention SmartTask has a Free Forever plan?
Get a free consultation on how to create a project timeline with SmartTask.


FAQ
How to share your project timeline?
You can invite your teammates and collaborate with them through the project’s share button. You can invite a team member as a project owner, editor, or comment-only user. Comment-only users can only comment on tasks and visualize the progress.
Comment-only permission is perfect for inviting your clients. You can invite your clients for free with our guest user feature.
How to edit project timeline?
You can edit the Project Timeline directly in SmartTask. All that needs to be done is a simple modification in the timeline view.
What are the challenges in creating a project timeline?
There are three main challenges faced while creating a project timeline, such as:
- Lack of Information - Every project needs succinct information to get completed. Any single misinformation can hamper the growth of the whole project. One must be very careful while deciding the project scope. It would be better to get the scope approved before executing it.
- Resource Unavailability - Managing resources is a mammoth task. A project manager should always be aware of the available resources. He/She should be ready to stretch the deadline or shrink according to the requirement. Keeping a buffer time helps here.
- Wrong Estimation - Timeline planning often deteriorates during the estimation phase. It is difficult to estimate how much time is required to complete a particular project because of the variable factors involved in it.
Which is the best project timeline management tool?
SmartTask is the best project timeline management tool that helps in creating a project timeline, setting deadlines, creating milestones, and setting dependencies for the project. It also enables us to edit and share the project timeline with the stakeholders involved, i.e. clients and team members.
What are the elements of a project timeline?
Timelines can have multiple elements according to their requirements. Here are the key values that should be there in any timeline:
- Deadlines
- Tasks and Subtasks
- Milestones
- Dependencies that are used to avoid bottlenecks
- Start and Due Date of Tasks


