Meta Lead Forms
Sync Facebook & Instagram Meta Lead Forms with SmartTask. Instantly convert new leads into tasks and never miss a follow-up.

Connecting Meta Lead Forms with SmartTask
SmartTask allows you to automatically capture Facebook & Instagram lead form submissions (Meta Instant Forms) and turn them into actionable Leads inside your SmartTask Project. This guide walks you through the setup process and explains how data mapping works.
What this integration does
Once connected:
- Every new form submission creates a Task and Contact in your selected project
- Lead details are stored in Task and Contact fields
- Existing contacts are matched by phone/email
- Optional fields like Form Name & Lead ID can be saved for attribution tracking and Meta Conversion API usage
- Optional auto-assignment to a user for follow-up
Prerequisites
Before you begin you must have:
- Admin access to your Facebook Business account
- Admin Access to the Page that owns the Lead Form.
- A SmartTask Project where leads will be stored as tasks
- Custom fields created inside that SmartTask project (for mapping)
Configure Meta Lead form in SmartTask
Follow the steps below to connect with your Meta Lead Form with SmartTask.
Step 1: Project Preparation
- Create or open a SmartTask Project where leads should appear.
- Switch to List View.
- Add any required Custom Fields to the project (email, phone, budget, industry, etc.).
Note: Only custom fields already existing in the project will be available for mapping later.

(Optional) SmartTask also supports additional internal lead-tracking fields like:
- Form Name - Text field
- Lead ID - Text field (Required for Lead tracking and Conversion API)
- Deal Stage - Select Field (Required for Conversion API)
Step 2: Connect Meta Forms
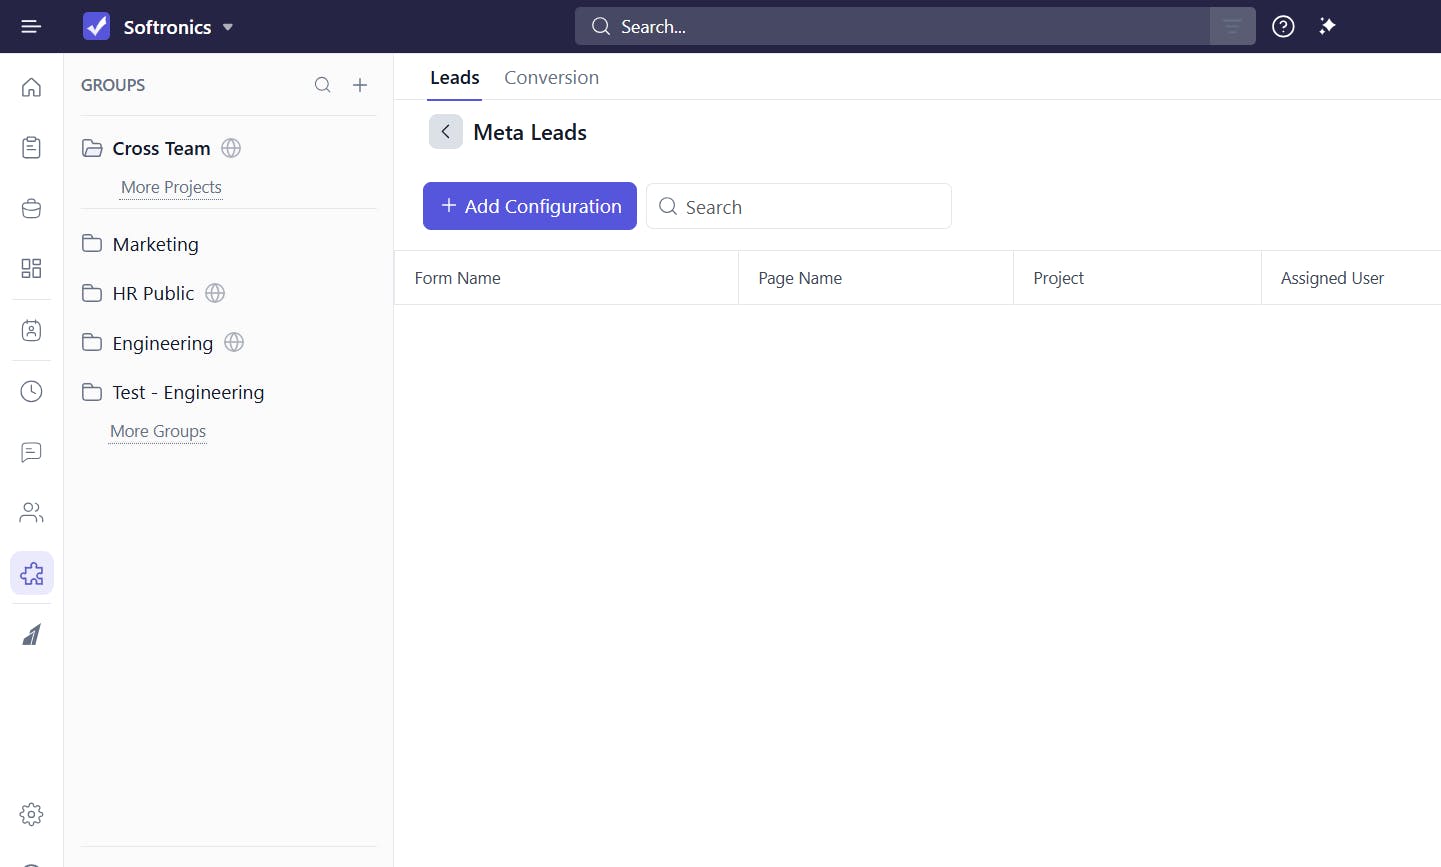
- In SmartTask, navigate to Apps and Integrations from the left sidebar.
- Select Meta Lead Forms.
- Click Add Configuration.
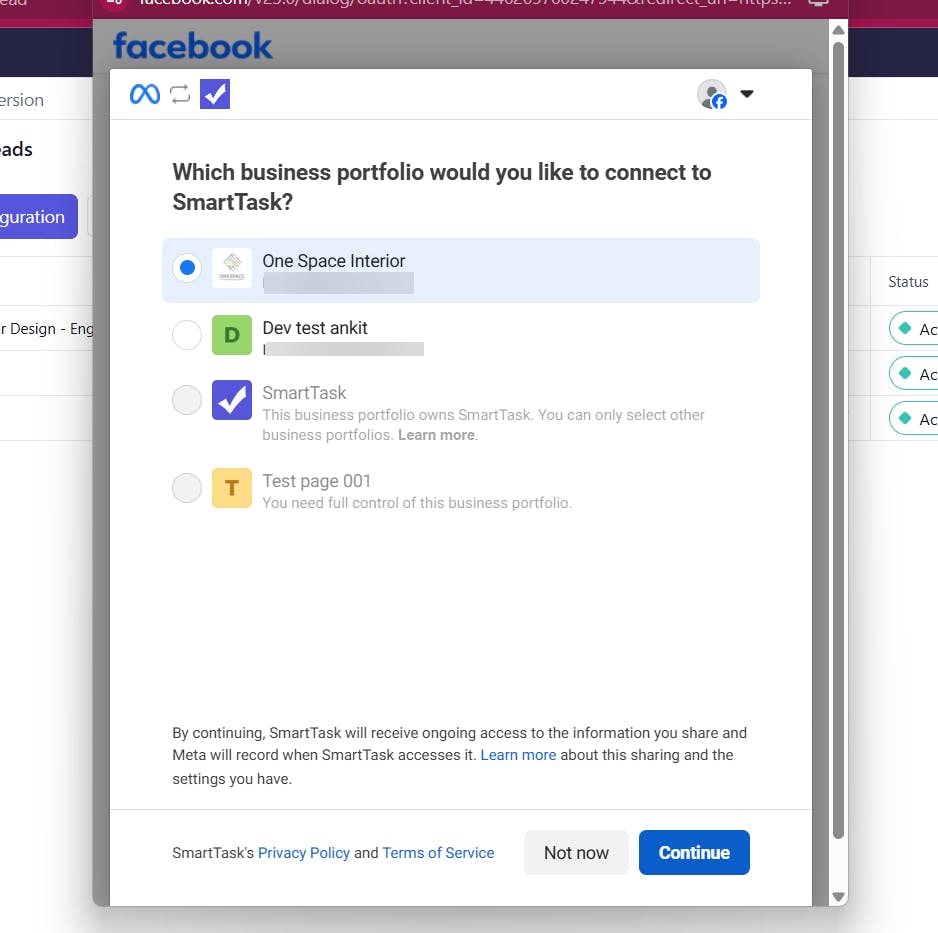
4. Log into your Facebook Business account. If already Logged in then select the Business account you want to use.
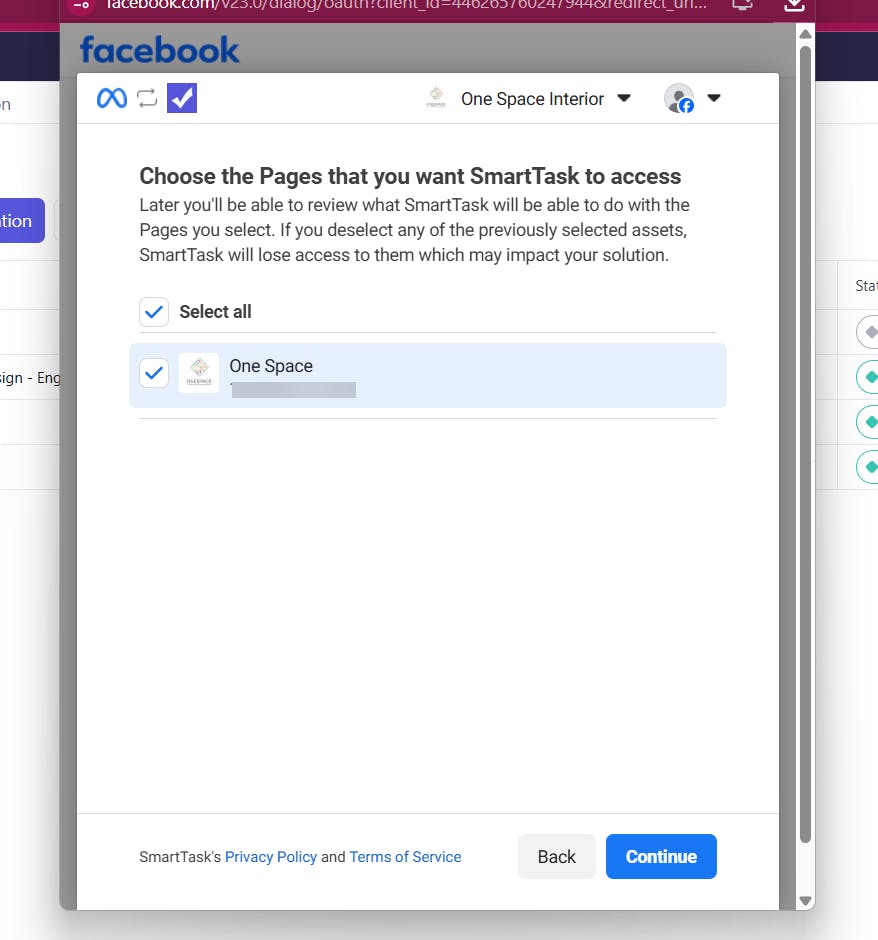
- Select the Facebook Page that has your Lead form and click on Continue button
- (Optional) Select Ad account and Pixel for conversion API integration.
- Click on Save. It will open a Configuration Modal
Step 3: Configure the Integration
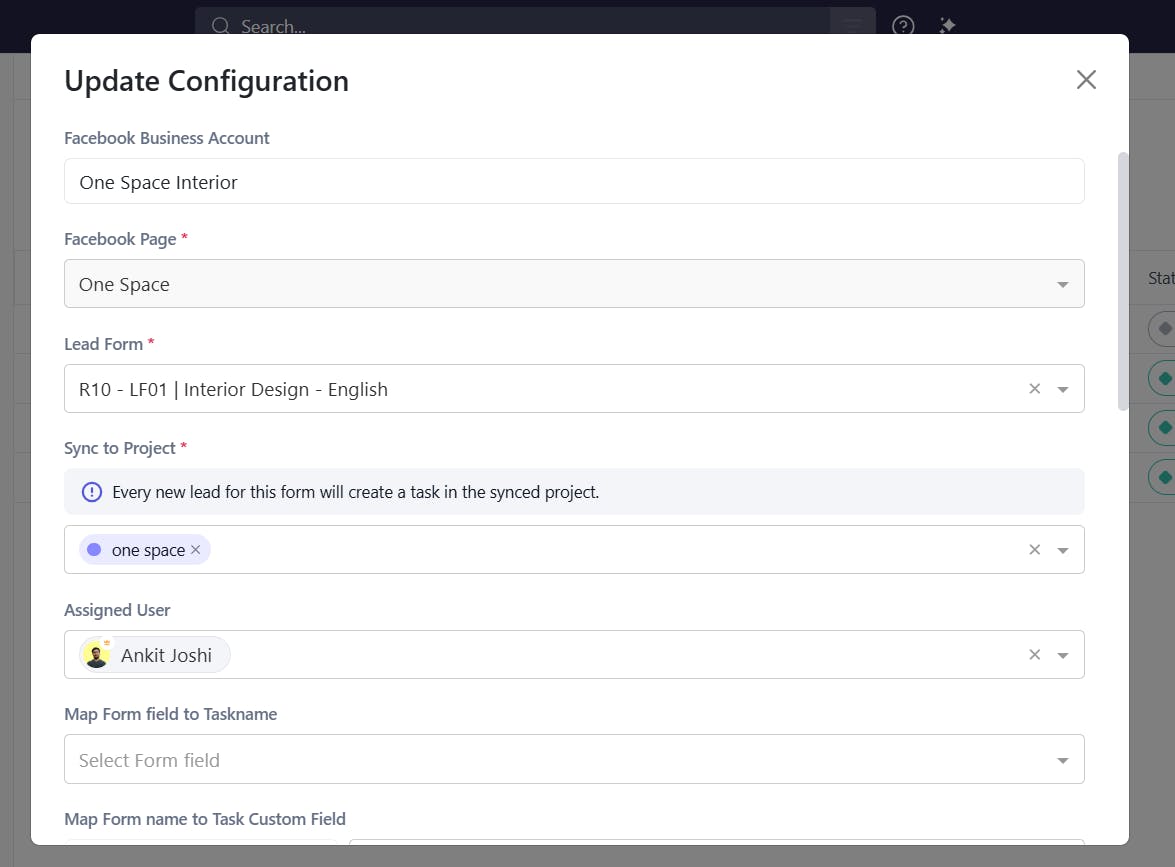
In the configuration modal:
- Select Facebook Page.
- Select the Lead Form.
- Select the SmartTask Project where leads will be created as tasks.
- (Optional) Assign a default user who will receive these leads.
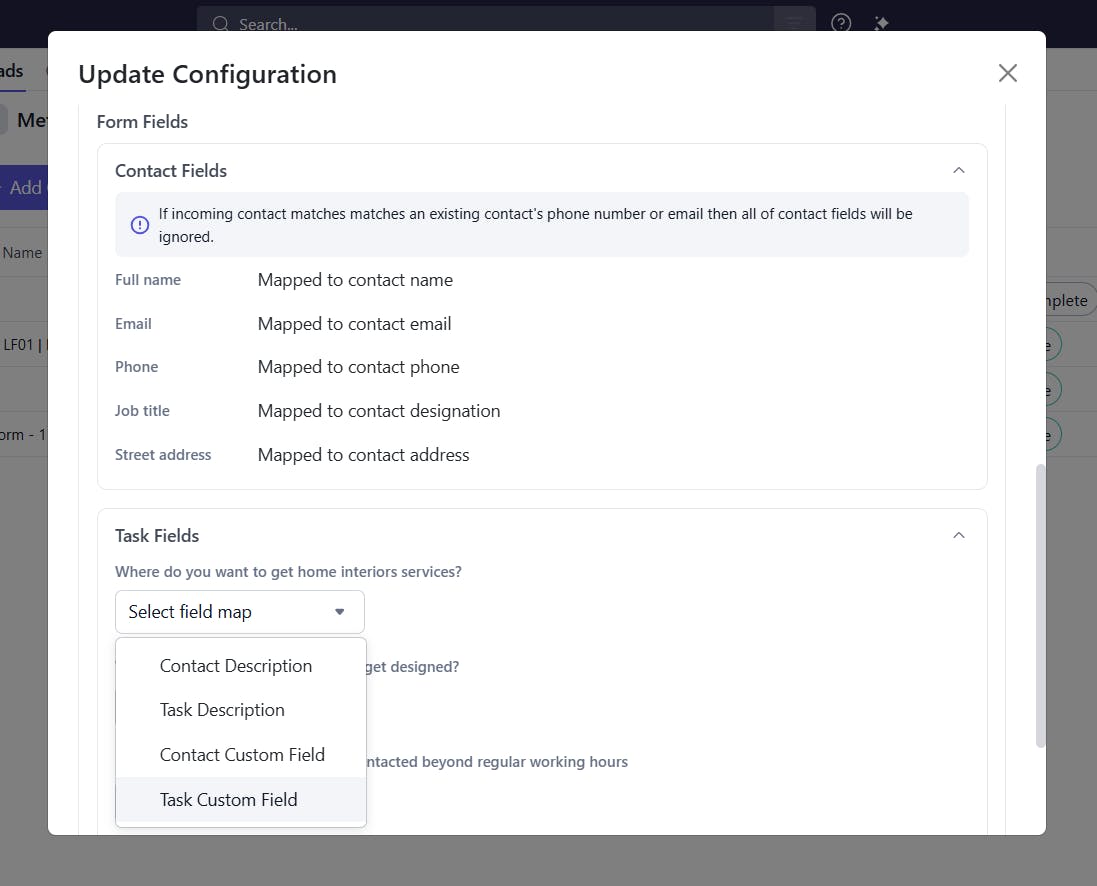
Step 4: Mapping Form Fields to SmartTask
You can map incoming lead form data to:
- Task custom fields
- Contact custom fields
- Task description
- Contact description
Note: Only the custom fields that already exist in the project are available for mapping in Task Custom Fields.
Task Name Mapping
You may map a form field (e.g., Full Name or Interest) to Task name.
If you don’t, SmartTask uses the format:
“[Form Name] – [Lead creation time]”
Tracking Meta Fields
For better tracking you can map following meta fields to your task.
- Form Name → mapped to a Task custom field
- Lead ID → mapped to a Task custom field (recommended for Conversion API)
Contact Matching Logic
SmartTask checks for existing contacts using:
- Phone number
- Email address
If a match is found, the existing contact is used, and contact fields are not overwritten.
Unmapped Fields
Any field not mapped will be ignored.
Step 5: Save & Activate
- Review your field mapping.
- Click Save.
Your connection is now active!
After Setup: Lead Flow Behavior
- Each new Meta form submission creates a Task in the selected project.
- Field mapping ensures task and contact data are stored correctly.
- Existing contacts remain intact.
- You can view, assign, comment, and follow-up just like any SmartTask task.
Best Practices
- Create custom fields in the project before configuring mapping.
- Map Lead ID for accurate Meta Conversion API usage.
- Regularly test form submissions to verify mapping.
- Use Assigned User to ensure every lead gets immediate follow-up.
Need help?
If you have any issues connecting Meta forms or configuring mappings, feel free to reach out to SmartTask support.
FAQs
1. Do I need admin permission on Facebook to connect the lead form?
Yes. You must have sufficient admin access on the Business Portfolio and Page that owns the lead form. Without permissions, SmartTask cannot fetch your forms.
2. Why don’t I see some of my fields during mapping?
Only custom fields already existing in the project are available. If a field is missing, create a new custom field in the project first, then reopen the configuration modal.
3. What happens if a contact already exists in SmartTask?
SmartTask checks for matching Phone or Email. If match is found, the existing contact is used and its fields are not overwritten. This prevents duplicate records and protects contact data integrity.
4. Can I connect multiple Meta pages or forms to the same SmartTask project?
Yes. You can create multiple configurations; each with its own project, mapping, and assignments.
5. Are older/historical leads imported automatically?
No. SmartTask imports only new submissions after the integration is configured. Past leads must be imported manually.
6. What happens if I delete a mapped custom field later?
The mapping will break for that field, and new form submissions will not populate data into it. Other mapped fields will continue to work normally.
Plan your resources smarter with one scalable client delivery management system.
Try it Live - It's FREE